LoRa APRS - part 3: Raspberry PI (3 or 4) image - ready to use with LoRa & 2m APRS and OpenWeb RX ( RTL-SDR )
Project description
It is exactly one year from my first LoRa APRS test. Thanks to Ondra OK1CDJ who sent me first device for testing. I have opened Facebook room about LoRa APRS a few weeks ago. Thanks this more and more people are interested to try it. That's why I have decided to prepare Raspberry PI (3 or 4) SD card image for PnP - you need to change your station data. You can use this image for LoRa APRS iGate based on IOT4pi project, also 2m (70cm) classic APRS based on RTL-SDR and OpenWeb RX.
All of my LoRa APRS blog posts here.
Download image and upload it to the SD card
At first you need to download image and upload it to SD card. You need 32 GB 8 GB (rev. 3) or bigger one. I recommend to use Samsung EVO or some similar higher quality card.
You can find last image here.
Download image from the link on this page and unZip it.
Then you need to copy it to the SD card. This is for windows users :) So please download and install this software: Win 32 disk Imager
Now you can insert SD card to PC, start Win32DiskImager and open UnZipped image. Select right Device (microSD card) and press Write. If you see error, eject and insert SD card again.
After that you can insert microSD card to Raspberry PI and start it. If the Raspberry is connected to LAN you need to find its IP address. You can find it in your router (DHCP clients), using some LAN IP scanner or connect HDMI monitor.
If you use LAN connection, download and run Putty.
Write right IP address and press Open. You will see information about certificate - do agree.
Write username: pi and password: raspberry
Now you should be logged in:
Write current one: raspberry and write your new one.
If you have bigger SD card than 32 GB you should resize partition.
You can check free space by: df -h
Resize card: sudo raspi-config
RTL-SDR device: test and calibration
Test if you can see RTL-SDR(s): sudo lsusb
Test if you can see RTL-SDR(s): sudo lsusb
You can see my two devices connected:
Calibration: sudo kal -d 0 -s 900
Means -d 0 is first RTL-SDR, -d 1 is the second one. -s 900 means calibration on 900 MHz GSM
Calibration using one of the scanned chanels: kal -d 0 -c 45
You can see my RTL-SDR frequency mistake. This one has internal TCXO, so it is very stable compare to cheaper plastic one. You can use this value to 2m APRS and OpenWEB RX.
LoRa APRS 70 cm based on IOT4pi
More about this project is here.
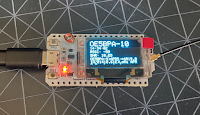
Tested with Raspberry PI daughterboard by Ondra OK1CDJ - Hamshop.cz , with RFM-96 (433MHz) You can use also I2C oled display + buttons.Configuration file is located in: /home/pi/iot4pi
File is: sudo nano APRS.conf
You can start IOT4pi with output to screen by: sudo ./iot4pi_LoraGW_01 (end CTRL + C)
APRS (2m or 70cm) with the PYMULTIMONAPRS
You can test RTL-SDR with raw decoding to screen:
sudo rtl_fm -f 144.800M -s 22050 - | multimon-ng -a AFSK1200 -A -t raw - (end CTRL + C)
sudo rtl_fm -f 144.800M -s 22050 - | multimon-ng -a AFSK1200 -A -t raw - (end CTRL + C)
Configuration file is located in: /home/pi/rtl/pymultimonaprs
File is: sudo nano pymultimonaprs.json
File is: sudo nano pymultimonaprs.json
You have to change:
- callsign: yourcall-10 (can have different number)
- passcode: you can generate it here
- ppm: more in calibration info
- gain: check gain you need with OpenWeb RX
- device_index: number of RTL-SDR - 1st is 0, 2nd device is 1 etc. There can be two RTL-SDR, one for 2m APRS and second for OpenWeb RX.
- lat, lng position: click on map and add point - this will show you position
- comment and text is up to you
Save configuration by CTRL + O (enter) and CTRL + X.
Copy config file to /etc by: sudo cp pymultimonaprs.json /etc/pymultimonaprs.json
Manual start with output on screen:
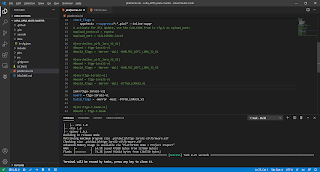
sudo pymultimonaprs -v (close with CRTL + C, later could start after boot)
Some more info at: this link
OpenWeb RX - web based receiver (RTL-SDR)
OpenWeb RX allows you to use RTL-SDR as web based receiver. You can have more frequency profiles, you can use also internal decoders like: WSJT-X, DMR, D-STAR, FreeDV, Packet Radio (can works as APRS iGw too) etc.
Configuration file is located in: /home/pi/rtl/openwebrx file is: config_webry.py (open with F4)
If you use more RTL-SDR in one Raspberry PI, then select different device index (-d 0 or 1) for 2m APRS and OpenWeb RX. I recommend to use first for OpenWeb RX and second for PYMULTIMONAPRS.
Manual start with output on screen: openwebrx.py (close with CRTL + C, later could start after boot)
You can open your browser: raspberry_IP:8073 example: 192.168.0.20:8073
Automatic start after the boot:
There is file where you can uncomment what do you like to start after the boot automatically:
File: sudo nano /etc/rc.local
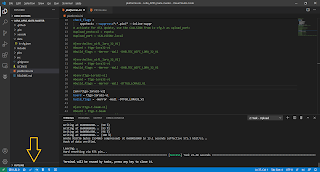
Example for IOT4pi auto start
All together :
My instalations:
OK2ZAW-1 & OK2ZAW-5
- Raspberry PI with LoRa APRS, RTL-SDR for 2m APRS and RTL-SDR for OpenWeb RX
- Wideband LNA + FM notch filter + 3-way CATV splitter. Lora has 433MHz BPF.
- Antenna is dualband X-30
OK2ZAW-2 & OK2ZAW-4 Cottage
- Raspberry PI with LoRa APRS and RTL-SDR for 2m APRS.
- Wideband LNA + 2-way CATV splitter. Lora has 433MHz BPF.
- Antenna is dualband X-30


